HOWDY! :)
A Collection of Fun Cards and Instructions
Hi! My name is Dani. I'm proud of what I do and wanted to find a way to share that to whoever felt like listening!
There are a variety of cards I have already made, before starting this blog - I am including instructions for some because I may not get a chance to reconstruct each of these cards again for you.
My cards are very simple - I find when I try too hard, things get ugly!
I am not a professional greeting card designer / creator. I am just a mum who has fun doing what is essentially Kindergarten work! :) My stuff is not perfect, but it's nice to share what you're proud of and nice to show people that as long as it's from the heart it doesn't matter if there are imperfections!
Here's a sampling of a few cards I have made (excuse photo quality - something I need to practice!):
An antique-y flag card. Very simple to make:
Fold your patterned paper and cut out a small triangle on the fold. This actually makes a diamond shape when unfolded
Repeat this step with other coloured cards and then ink the edges of the diamonds with a brown ink
Find some manner of string - I used the thread you can easily buy for cross-stitching (I didn't pull it apart, used full thickness)
Put adhesive on the back of the cut out diamonds and fold them over the string at regular intervals so that they look like pennants/flags
Drape this flagged string over the card and secure at the back of the card with tape. I actually ran some cardstock squares, that match the card, through my little
Xyron Sticker Maker. Blank address labels from your stationery store is another neat option.
Make sure to trim any excess string at the back.
Put adhesive on the back of each pennant and stick them carefully to the card, allowing them to sit as naturally as possible. I used double sided sticky tape but a tiny amount of glue would be good for this step because it would allow the penants to settle naturally.
Choose your greeting stamp and stamp it on a piece of cardstock the same as your card.
Scrunch the greeting up mercilessly! You want it to end up very wrinkly and feeling a lot more softened - this was the most satisfying part of the whole card!
spread it out flat again and lightly run your brown ink pad over it so that the brown accentuates the wrinkles and creases. Distress the edges of the greeting with a distressing tool or thread cutter and ink the edges with the brown ink.
Cut a piece of brown cardstock to be only a little bit larger than your greeting. Mount the greeting on this with double-sided sticky tape then mount them both on the card with more double-sided sticky tape.
Finally do a few tiny embellishments. Each to their own but I but a pearl in each corner of the card because I'm nuts about symmetry, and I put a cute little spiral paperclip on the greeting.

A quick style of card:
This card requires a CUTTLEBUG or similar
Cut a piece of white cardstock to be slightly smaller than your chosen embossing folder so that the design goes all the way to the edges. You could just trim it up afterwards but I find sometimes the raised design gets a little squashed in the trimming tool
Run your cardstock and embossing folder through your cuttlebug. Lightly run your chosen ink colour over the top of the design. It's not a big deal if it smudges across other areas, the main point is to really HIGHLIGHT the embossed design
Wrap a wide piece of ribbon around the embossed and inked cardstock. Find another piece of ribbon either either a contrasting colour or a contrasting design, slide a buckle onto the smaller piece of ribbon and wrap it around the cardstock also, across the middle of the wide ribbon. Both should be fastened all the way around with double-sided tape
Create a tag. For this I cut out a rectangle and used a special corner trimmer on the corners at ONE end. Complete the tag look by punching a hole in the rounded end and threading string, thread or wool through it.
Ink the edges of the tag with your chosen ink colour and stamp the greeting on it. Stick this to the embossed cardstock with foam tape so that the tag is raised. I also embellished the tag with a little spiral paper clip.
Stick this onto the front your card with foam tape or Zots.

Another variation of the above card :)
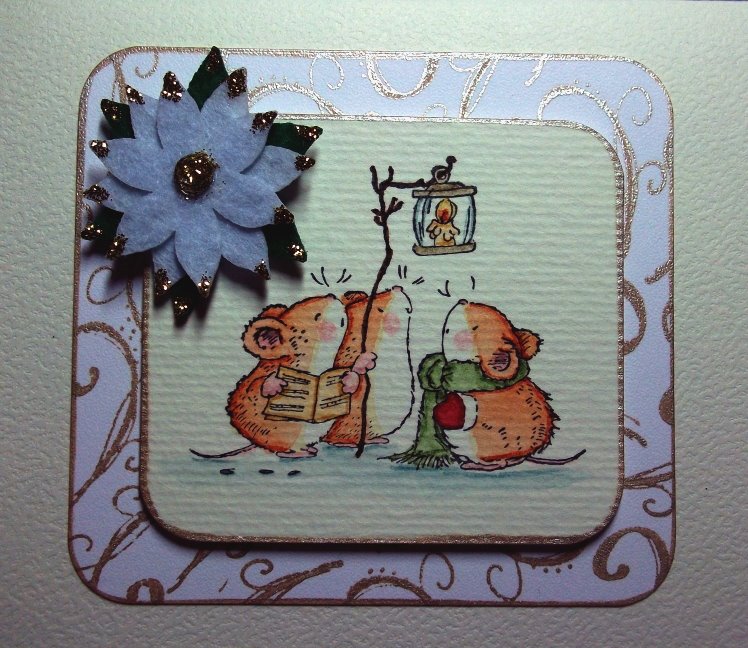
A mini stamped card that is crazy-basic:
Follow these instructions to create your own background
Follow these instructions to colour your chosen stamped images
- Affix your coloured images with foam tape so that they stand out
- Stamp greetings onto the background paper to suit
- Embellish!! I love teeny tiny buttons and sparkly gems :)
- Ink the edges of the background card and stick it to your card with double-sided tape!
This pop up card took a while to make even though the design is simple. It's definitely something that will require a step by step photographic blog entry of its own ... so for now, sorry no instructions! :(
Butterfly greeting:
A basic version of
this card. Requires a cuttle bug or similar, with a butterfly cutting die - or a butterfly punch!
The butterfly on this one has been embossed with the folder provided with the cutting die. The embossing has then been inked and the edges of the butterfly (not really visible in this pic) have been painted with Kindy Glitz (a sort of glitter glue).
This is actually a photo display (in a shadow box frame) with a matching card that I made for my brother in law for his 30th birthday
The clock background is literally the way I bought it, trimmed down only slightly so it would fit in the frame. The rest is fairly self explanatory - wooden embellishments bought and inked with brown ink (Stazon Saddle Brown).
The photo will sit on the rectangle on the lower left side, which is made up of: brown backing card, spotted card to make it a little more decorative and contrasted, and a couple of squares of the brown backing card have been put on to give it an interesting and slightly contemporary look.
His name (and the greeting on the card) has been stamped onto cream card stock with gold ink and then stuck onto the back of the wooden mini frames and trimmed down to size.
The edge of the card is inked with the saddle brown ink and both spotted cardstock pieces had their edges inked with a grey-ish blue.
I painted the frame dark brown and decided to keep it plain like that because the design inside is so busy.
These pictures are of a wallet card I made - for gift cards like an i-tunes card. Surprisingly quick and easy to make! Here is the basic construction of the wallet, without embellishments:
Cut a piece of patterned card 26cm by 9cm. Have the patterned side as the inside of the card and the block colour as the outside of the card when you fold it in half
Round the bottom corners to make it look "wallet-ish" using a corner rounder.
Cut out two rectangles of the same paper 11cm by 6.5cm. The block colour side will be showing when these become the pockets inside the wallet. Round the bottom left corner of one and the bottom right corner of the other to match the wallet. Use a small circle punch to cut a "notch" out at the middle top of each pocket. This will make it easier to get the gift card and greeting tag out.
Ink the edges of the wallet (inside AND out) as well as the edges of the pockets (on the block colour side).
Place double sided tape around all edges of the pockets (on the patterned side, which will be hidden) EXCEPT for the top edge. Try to leave no gaps and keep the tape close to the edge so that there is plenty of room in the pocket for the gift card
Stick the pockets inside the wallet, centring each one as shown in the above photo.
Create a greeting tag to go in one of the pockets, make it the same size as a gift card (see pic above)
Embellish to taste! As you can see, I've found other paper with similar colourings and fussy cut some designs and stuck them inside and out. I stamped a birthday greeting (roughly, to suit the kind of antique look) on the front and adorned the wallet with some small, strategically placed pearls.

I made this card for a friend who was attending the wedding of some friends. Honestly, this took me about an hour to throw together and is as simple as it looks! Bear with my instructions though, I made this a long time ago and am trying to remember how I did it by just looking at this picture.
Have a square white card ready, about 15cm by 15cm when folded.
Cut the a patterned piece of paper to fit half the front of the card exactly, right to the edges.
For the ribbon I got a nice gauzy one and doubled it up and slid on a nice bejewelled buckle. Wrap this around the very top of the patterned card and fix with double-sided tape at the back and under the buckle (so that the weight does not make it hang)
Affix the patterned-ribboned card to the bottom of the front of your card with double-sided tape
Stamp your greeting in the top right corner. Keep it simple!
Next you need to find a really pretty swirly pearl embellishment - and hack the crap out of it! Yep - I buy those swirly designs with the full intention of cutting them to pieces so that they fit my card exactly how I want! Stick the pieces on accordingly :)
Happy Greetings!
Dani :)